
A Step-by-Step Guide to Soft Atmosphere in Watercolor
from Andy Evansen
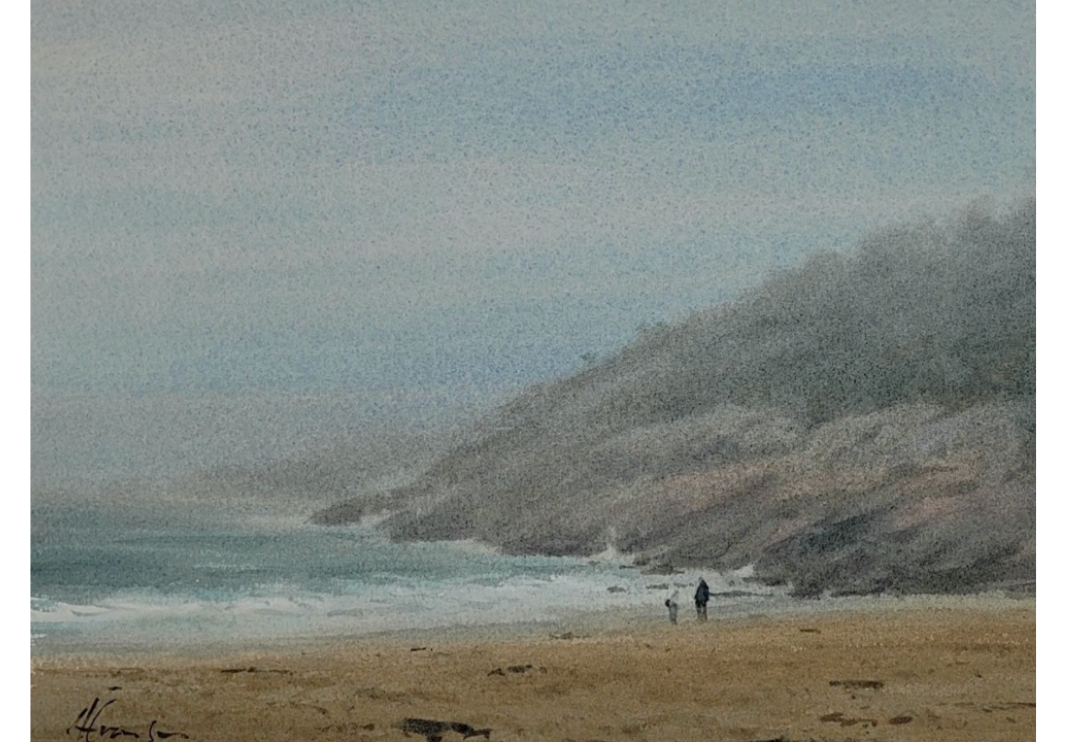
Summary: Andy Evansen paints fog by compressing values, working wet-into-wet, and gradually building darker shapes with thicker paint. The key is soft edges, subtle transitions, and a quick drop-off in value as forms recede into the distance.
Why Fog Is Different From Other Scenes
For Andy Evansen, fog changes everything about how a painting should be approached.
In a typical landscape, artists rely on strong contrast—light lights and dark darks—to define form. But in a foggy scene, that contrast disappears.
Instead, everything shifts toward the middle range of values.
No bright whites
No deep darks (at least early on)
Very subtle transitions
This compression of values is what creates the feeling of atmosphere and depth.
The Core Principle: Value Drop-Off
Andy emphasizes one of the most important ideas in painting fog:
Objects lose clarity and value much faster than in a normal scene.
In clear weather, something far away might still hold its value and structure.
In fog, that same object becomes lighter, softer, and more vague very quickly.
This rapid loss of definition is what creates the illusion of distance.
Step 1: Keep the Drawing Minimal
Andy avoids heavy drawing in fog scenes.
Instead, he:
Lightly indicates only major shapes
Keeps edges soft
Avoids dark pencil marks
Overdrawing can destroy the softness needed for a believable fog effect.
Step 2: Start With a Very Wet Surface
One of Andy’s key techniques is working on very wet paper.
He wets both:
The back of the paper
The front surface
And importantly, he does not remove much water.
Because fog requires:
Long working time
Soft edges
Seamless blending
A wetter surface allows all of that.
Step 3: Push the First Wash Darker Than You Think
Because watercolor dries lighter, Andy applies the first wash stronger than it appears in the reference.
He mixes:
Cerulean blue
Cobalt blue
Lavender
Neutral tint
Then lays a unified wash over the entire surface.
This wash establishes the atmospheric tone of the painting.
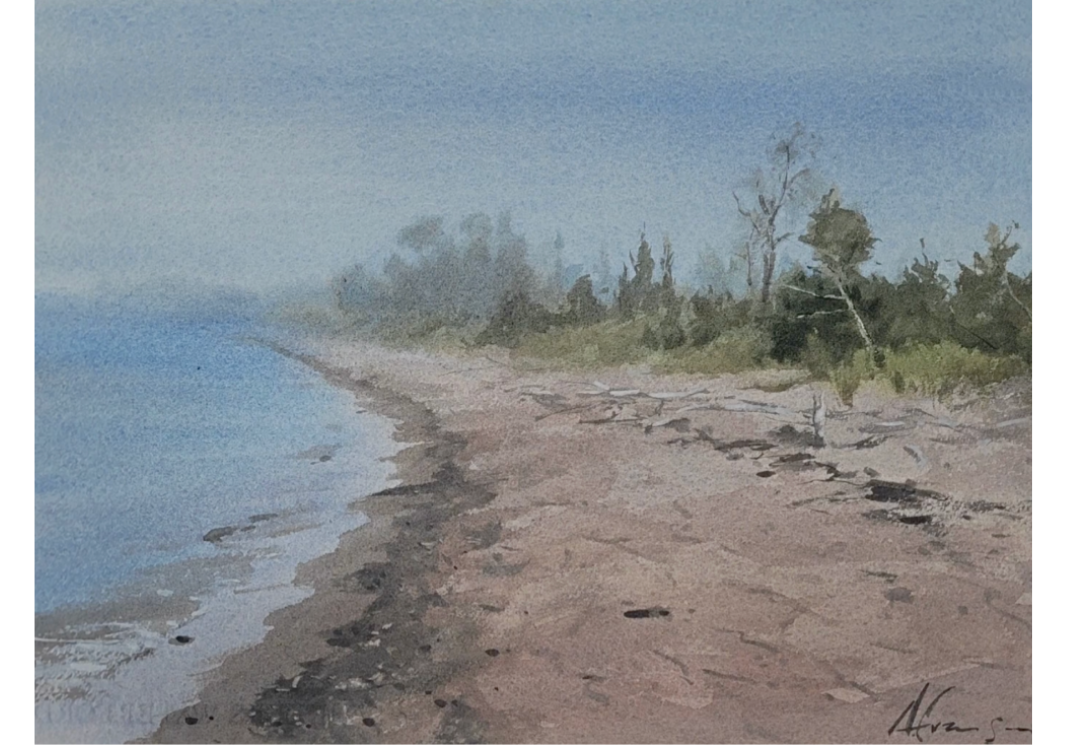
Step 4: Subtle Color Shifts Matter
Even though fog scenes are soft, they are not flat.
Andy introduces variation by shifting color:
Cooler blue in the water
Slight violet tones near the shoreline
Muted, cool browns for sand
These transitions are subtle but essential.
They keep the painting alive without breaking the foggy mood.
Step 5: Work Wet-Into-Wet for Distant Shapes
While the paper is still damp, Andy begins adding distant trees.
Key approach:
Use thicker paint
Use less water
Let edges soften naturally
He avoids sharp edges at this stage.
The goal is suggestion, not detail.
Step 6: Build Layers Gradually
Andy works from back to front, increasing strength slightly with each layer:
Background trees (very soft, cool)
Middle ground shapes (slightly warmer, slightly darker)
Foreground shapes (more definition and contrast)
Each layer is added while the paper is still damp or just beginning to dry.
This creates natural blending and depth.
Step 7: Control Water Carefully
Too much water at the wrong time will ruin the painting.
If the brush is too wet:
Paint blooms uncontrollably
Edges lose control
Shapes become muddy
To avoid this, Andy:
Uses synthetic brushes for control
Removes excess water with a towel
Focuses on applying mostly pigment, not water
Step 8: Add Contrast at the End
Fog paintings still need contrast, but only in the final stages.
Andy deepens values in the foreground using:
Neutral tint
Burnt sienna
Payne’s gray
This creates:
A clear focal area
A stronger sense of depth
The illusion of fog through comparison
Without this step, the painting can feel flat.
Step 9: Use Dry Brush and Texture Sparingly
As the paper dries, Andy introduces:
Dry brush for foliage
Subtle texture in the foreground
Light directional strokes in water
This adds interest without overpowering the softness.
Step 10: Final Details With Gouache
Andy sometimes uses gouache at the end to add:
Driftwood highlights
Soft foam edges
Small accents
He tones the gouache down with color so it doesn’t appear too bright.
This keeps everything consistent with the foggy atmosphere.
Common Mistakes When Painting Fog
Andy often sees artists struggle with:
Too much contrast too early
Overdrawing details
Not using enough water at the start
Adding too much water later
Trying to “finish” instead of observe
Fog requires restraint and patience.
The Big Takeaway
Andy’s approach to fog comes down to three things:
Softness through wet-into-wet technique
Subtlety in color and value shifts
Timing of moisture and paint application
When done right, the painting feels effortless, but it requires control behind the scenes.
Final Thought
Andy often reminds students that fog is not about detail, it’s about suggestion.
If everything is clearly defined, it won’t feel like fog.
But if shapes soften, values compress, and edges disappear, the atmosphere will naturally emerge.
Learn more from Andy through his mentoring membership or video series: